
One of my new favorite online shops is The Ribbon Retreat. I was so excited to be able to pick out some fabric to sew a new bag with. They have such amazing designer fabric, and I bet I spent a good hour or two trying to pick out which fabric I loved the most out of all of their cute fabric!
I knew I wanted to sew a bag, because I love me a good bag. And I have a ton of them. Just ask my husband.
But, good bags are hard to find. And they are expensive. And if you do find a good, reasonably priced bag, chances are it’s got Hello Kitty or something hideous on it…
So when I needed a new bag for church, I decided to make my own. One that would be sturdy enough to hold books and binders, and 25 pounds of fruit snacks. Oh, and be cute… cute is a plus.
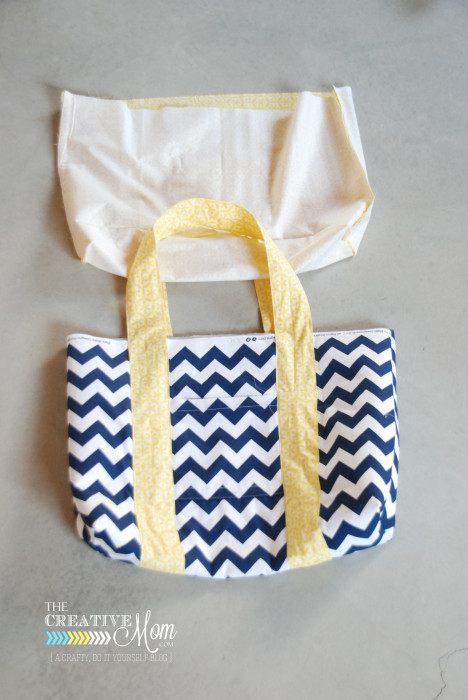
And I think this one will do the job.

This bag is big, really big. Jumbo, even. It’s strudy and it’s cute!
The fusible fleece helps it so it’s not too floppy and flimsy. So, although it’s soft, It still holds it’s shape. And the lining really finishes the whole bag. I love a lined bag. I love that every once in a while, you get a peek-a-boo of the inside fabric, and it’s just like an extra surprise that you weren’t expecting!
I also added a little magnetic clasp to keep it closed up nicely. It’s those finishing touches, like lining and adding bag hardware that really makes it seem like a professional made bag, even though it was actually made by little old me. And trust me, I’m no professional.

You don’t need to be a master seamstress to sew this bag (in fact, if you are a master seamstress, please stop reading because I just made this pattern up and I’m no expert). All together, it took about 2-3 hours to sew.
My finished bag is about 15″ tall by 21″ wide with a 4″ deep base. The straps are approximately 20″ long. You can use this tutorial to make any size bag you want. The instructions will be the same, just change the size of fabric you use.
To make a bag the same size as mine, you will need:
1 yard outside fabric (mine came from here)
1.5 yard liner fabric (mine came from here)
1 yard fusible fleece
1 magnetic clasp

Start by cutting your fabric.
(all measurements in this post are in inches)
Outer fabric: 24×36 If you are using a pattern that has an up and down, like my chevron, make sure you take that into account when cutting.
Inner fabric: 24×36
Fusible fleece: 24×36
Handle: 5×144 (you might need to stitch two or three lengths together)
Pockets: 7×8 (these can really be any size you want)
Start by ironing your fusible fleece to the wrong side of your outside fabric.

If you want a pocket, you’ll need to make that next. You can make your pocket any size you want. Mine is about 7×8 inches.
Fold the sides over twice and stitch down to finish off the edges.

Top stitch your pocket onto your bag. Make sure you only do 3 sides.
Mine was centered on the front and about 5 inches down from the top.

And you should have something that looks like this… (My pocket is hard to see because I purposely matched the print on the pocket to the print on the bag.)

Next comes your handle. You make your handle by creating a tube, a REALLY long tube. Fold your strip in half (right sides together), long ways, and sew down the edge. Then turn right side out.
If you don’t have a piece of fabric 72 inches long, you’ll need to stitch two together like I did. Just fold the end of one of the tubes in, and stick the other end in it. Then sew it flat.

I messed up and forgot to attach my handle to my bag before I stitched up the sides… So, if you want to save yourself a headache, sew it on now.
You’ll need to stitch down one edge and up the other edge of your handle fabric. Start and end, in the middle of your fabric, so your ends will be on the bottom of your bag. And make sure to tuck the ends inside each other, like I showed you above.
While you are sewing on your handle, make sure to stop sewing about an inch from the top and an inch from the bottom of your bag fabric. Pretty soon, you’ll need to stitch your lining to your bag, and if you’ve got the handle sewn on that part, it’s not going to work out well.
Hopefully my horrible illustration below will help you out.

Now, fold your fabric in half, right sides together and sew along both sides. In the photo below, you can see how I sewed on my pocket.

After you’ve got your sides sewn together, open the bag up, and fold a triangle on each corner, with the side seam in the middle. Since my bag is going to be 4 inches deep, I measured 4 inches across, making sure my seam stayed in the middle of my triangle.

Sew across that line and then cut off the excess.

Now your bag has a bottom! Yay! We are making progress! And imagine the bag has handles on it.

Now to sew the liner. Repeat all the steps we just did on the outside fabric, with your lining, minus the fusible fleece and the handle.
Sew a pocket on.
Fold up, and stitch the sides together.
Sew the corners, and clip the excess off.
Also, if you want a clasp on your bag, do it now, before you stitch the lining to the bag. I got mine here.

Ok, so by now, you should have an outside and an inside (liner). Keep your liner turned inside-out and stick it inside your bag.)

Fold the top edges over and pin the inside liner to the outside fabric of your bag.

Here’s a tip for attaching the liner to your bag… Start by pinning the side seams together on one side of your bag and then the other side of your bag. Then pin the middle in the front and the middle of the back. Then pin between those pins, and between those pins, etc. That way your liner will end up sewn in straight.
Once you’ve got it all pinned, top stitch the two pieces together. Make sure your handle gets stitched down too. In fact, I stitched over my handle a few times just to make sure it’s secure.

And you’re done!

Now you’ve got yourself a really handy (and pretty) tote bag. Perfect for the beach, the park, or carrying all those snacks to church.
Make sure to “pin” this image to your Pinterest board, so you can find it later.
If you hover your mouse over the image a “pin it” button will come up. Click on it, and you’re good to go!
Nikki says
Hello! Just wondering what type of fabric you used to create this bag?
Sarah says
I’m making this bag and am stuck on the handle. My long tube before sewn together is a bit shorter than yours. However, when I placed on the bag to pin for sewing, it just seems so long. Any ideas or tips? Thank you in advance!
Sarah says
Maybe it’s the distance from strap to pocket on each side? How far apart from pocket did you place the straps?
Natalie Dalpias says
I think my straps were about 2 inches from the pockets on each side. Hope that helps!
Katherine says
just finished making this out of heavy upholstery fabric with gabardine lining, skipped the iron on Pellon – after sewing on straps, put in zipper, then side seams, then add lining. GREAT BAG – GREAT INSTRUCTIONS.
Amanda says
I love this tutorial and the bag look easy to make. I want to make this as a diaper bag for my new baby. I don’t sew a lot, and I want to add a zipper to this instead of the clasp. Any tips?
Heather Asmus says
LOVE it! As a professional seamstress all I can say is KUDOS to you! Love it! I will be making this for myself soon!
Ashley says
I am a college student who loves to sew. I made this bag for a weekend getaway bag was the perfect size! Thank you!!! 😀
Kelly Wallin says
Thanks for the tutorial! I’m halfway through this bag and it seems you may have posted the wrong length for the handle. I cut mine 5×72 and the handle is much too short, was it supposed to say you needed two at 72″?
Natalie Dalpias says
Kelly,
YES!!! I messed up, and I’ve corrected it now. But you are supposed to have TWO 72 inch straps that you stitch together to make a really long strap.
Kristy says
Great looking bag and tutorial! Thinking I might just have to try this out! 🙂 Thanks for sharing!
Anonymous says
Love your bag! and thanks for the tutorial! Love Hello Kitty–especially Kiss/Hello Kitty
Britni Newton Vigil says
25 pounds of fruit snacks? Are you in nursery? Ha. Just pinned this to hopefully make it one of these days if I ever can get myself to stop blogging. So cute.