
How to Install a Simple Bathroom Shelf
I’m so excited to show you how I made this quick and easy bathroom shelf.

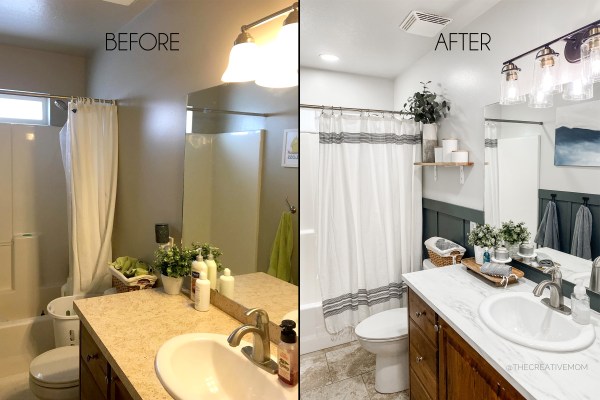
I wanted to update the look of my main bathroom, and one of the things that was making it so dark and rustic looking was the old shelves above the toilet. These industrial farmhouse shelves definitely needed to be replaced with something a little cleaner and easier on the eyes.

Since I loved the shelves I put in my laundry room, I wanted to mimick those. In my laundry room, I used the Crates and Pallet 12 inch Black Steel shelf brackets, and I have been so happy with them! I loved how they were so easy to put together, so I decided I wanted to use the same type of bracket.
So, I was so excited when I found these simple shelf brackets from Crates and Pallet at the Home Depot, I knew they would help me make a really simple bathroom shelf. I liked the look of these for my bathroom because they were lipless, which makes for a more clean, modern look. And, these brackets come in both black and white, in a 6 inch or 9 inch size. I absolutely LOVE the way this shelf looks in my bathroom now.


One of the things I love about using these brackets is that you can use off-the-shelf lumber. For my bathroom shelves, I used the 6″ brackets, which fit perfectly with a basic pine 1×6 board that I got from the home depot. In my laundry room, I used a melamine shelf board, which was great because I can easily wipe it down.
Let me show you how easy it is to install this bathroom shelf.

Supplies Needed for a Simple Bathroom Shelf
- Simple Shelf Brackets
- Stud Finder
- 2 1/2″ screws or drywall scews
- pine 1×6 board or other shelving material
- Level and measuring tape (I have a basic tool set to keep around the house)
- Stain and Polyurethane
- Impact Driver
- 1/2″ screws
How to Install a Simple Bathroom Shelf
DIY Simple Bathroom Shelf
- Choose Shelf Brackets
I chose to use these simple shelf brackets from Crates and Pallet at the Home Depot. I chose 6″ brackets in white. Each pair of brackets holds 200+ pounds. To keep shelves from sagging, you’ll want to place brackets about 15″ apart on 3/4″ material (like a 1×6), and about 36″ apart on 1 1/2″ material (like a 2×6). Since I was planning on a 30″ shelf using a 1×6, I only needed 2 brackets, but could have used more for aethetics if desired.

- Cut Shelf to Length
The 6″ brackets fit perfectly with a basic pine 1×6 board that I got from the home depot. I just cut my board down to size at 30″
- Sand and Stain Board
Use a high grit sandpaper (200 or above) and sand down your board. Then apply stain. I used Special Walnut. After the stain is dry, seal the wood with a polyurethane.

- Measure and Mark
Find where you want your shelf, then measure and mark where it should go. If possible, you’ll want to place your shelf brackets on a stud. A stud finder can help find the studs.
- Hang Shelf Bracket
Use an impact driver and screws to hang the shelf brackets. If you are able to place your bracket over a stud, use 2 1/2″ screws so they grab into the studs and stay secure. If it’s not possible to hit a stud, then you’ll want to use drywall anchors. These drywall scews are my favorite.

- Level Shelf Brackets
First, attach one screw in your first shelf bracket. Then place your level on the top of the bracket (against the wall). Once the bracket is level, attach the bracket with a second screw into the wall. Then you’ll hold your second bracket into place, and place the shelf on top. Put the level on the top of the shelf, and once it is level, attach your bracket with screws.

- Attach Shelf to Brackets
Use 1/2″ screws to attach the underside of the shelf to the shelf brackets.

- Decorate and Enjoy
After the shelf is hung, add decorations and enjoy!


This post was sponsored by Crates and Pallet. However, all opinions, pictures, and ideas are my own. As always, I never share products with you that I don’t actually use (and love!) in my own home.
One Comment