
DIY Jewelry Making

I love to DIY everything. From building furniture to making up yummy recipes. So you had to know DIY Jewelry Making was bound to happen. This isn’t my first go at jewelry making, though, I posted these cute metal earrings about a year ago. I loved them so much that I wanted to try it again! My daughter even got in on the DIY jewelry making action this time, and she loved it just as much as I did!

I love that this jewelry is totally customizable. You can paint them any color you want (I’m thinking I need one for each outfit). And, with earrings at less than a dollar a pair- that’s right, I said a DOLLAR per pair!!!!- you can’t go wrong with these bad boys. I am going to be making some of these earrings to give to my sisters and nieces for Christmas. It’s the perfect homemade gift idea for any girl on your list.
Or, if you don’t want to paint it, the jewelry pieces start out as gold, silver, and antiqued bronze (like below), so you could just leave them how they are and skip the painting all together. Either way is totally cute!

Supplies:
1. Jewelry Pieces– all my pieces came from Swanky Adornments on Etsy. Trust me, I spent like 3 hours searching the interwebs and this shop has the best prices and they have everything you’ll need.
2. Paint
3. Spray Sealer![]()
Directions:
1. Start by painting your jewelry pieces. You can do this two ways. I have tried both, and both work just great. The first method I showed you with painted earrings. You basically roll out a big piece of butcher paper or newspaper and use regular craft paint and a foam brush to paint them. Or you can spray paint everything. SO easy.

2. If you want a distressed look, use your fingernail or take a little sandpaper and sand here or there on your jewelry piece to get some of the paint off. I don’t always do it, but sometimes it can make a huge impact on how the piece looks.

3. After you’ve got them the color you want them and they are dry, lay them all out flat and spray them with a Spray Sealer![]() . This is my favorite kind of sealer- it doesn’t yellow over time. Trust me on this one!).
. This is my favorite kind of sealer- it doesn’t yellow over time. Trust me on this one!).
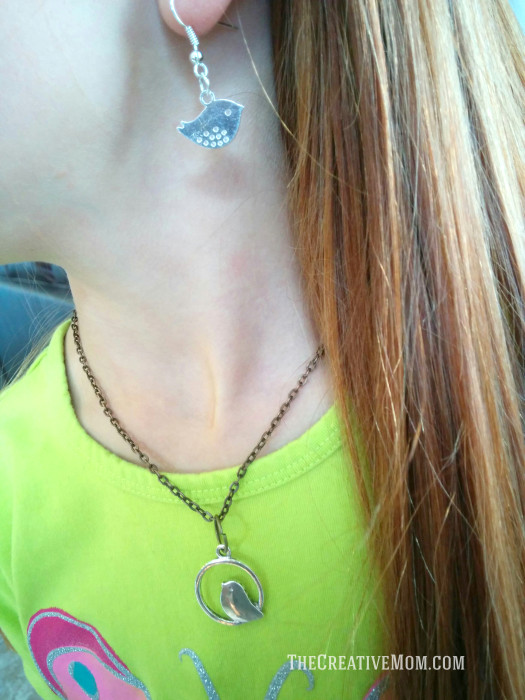
4. Once your pieces have dried completely, use some ear wires for your earrings or put your peices onto a chain for a necklace. I used a few different pieces together in one necklace and I absolutely love it! (see the image at the top of this post).

And you’re done!
My daughter just got her ears pierced, and she thought making jewelry with me was great! Since I didn’t want her using spray paint, she used silver pieces that she didn’t have to do anything to! She used a bird on a swing for her necklace and some tiny silver birds for her earrings. She wants to make these for all her friends for Christmas, and since they end up being around a dollar a pair for the earrings and less than a dollar for the necklace charm, I’m all for that!
Here are some other cute ideas if you don’t really want to paint your jewelry. All you have to do is throw these ones together.


I received these jewelry pieces from Swanky Adornments to review for this post. But I have purchased from them before, and I would totally purchase from them again. As always, I would never recommend any product I wouldn’t actually use myself.
I love these blue leaf shaped earrings.
Thanks for sharing these tips and article.
Its very nice.