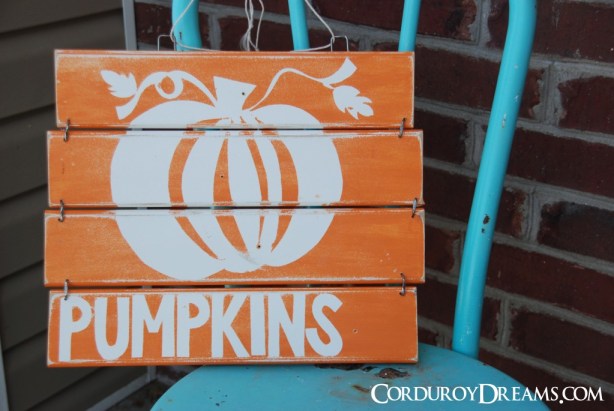
Scrap Wood Pumpkin Sign {expressions vinyl}
I am so excited to introduce you to my newest sponsor, Expressions Vinyl.
They carry all sorts of stuff, not just vinyl. I will be showing you a few different craft and home decor ideas using some of their products during the months of October and November. So stay tuned!
I love using their vinyl with my Cricut, because it’s really good quality and such a good price ($1.89 for 12×24). Joann’s vinyl is more than twice that amount, and they don’t have near the selection.
Did you know that vinyl isn’t just for people with craft cutters? If you don’t have a Cricut or a Silhouette, you can still do some really cute things with vinyl!
Can you believe I did this project without a craft cutter? You can too!
In fact, I did the project with things I just had around the house.
You’ll need:
Scrap wood boards
Paint and brush
Big staples and a hammer
Vinyl and scissors (I used my scrap vinyl)
And having some cute little helpers is always a good idea!
Cut your scrap wood to size. Mine were leftover from our baseboards and casing. They were about 4 inches wide by 15 inches long.
Paint your boards whatever color you want your writing and pumpkin to be. Mine were already white, so I just went with that.
Tape the backs together how you want them. This will keep them together while you work.

Draw your letters on the paper backing of your vinyl. I freehanded mine, but you can print something out and trace it if you want. Make sure you do your letters flipped.


Place your vinyl on your boards how you want them. You don’t need transfer tape, just peel the backing off diagonally as you go.
You will be pealing this vinyl off later, so if you have to piece it together, that’s fine!
Paint over the entire thing, vinyl and all.

Once your paint has dried for a few minutes, peel off the vinyl. Don’t let it dry ALL the way, or it might peel off parts you don’t want it to. I used a toothpick to get under the vinyl.
I wanted mine to look a little worn (or crappy if you ask Casey), so I sanded the edges and the fronts of the boards a little.

Then take your big ole staples and hammer the staples into the boards. I’m not sure where you get these staples… at home depot somewhere. These are leftover from Casey building our fence and stapling the fence to the posts.


This is a very easy Halloween craft that you can make with things you have around the house.
And you don’t even need a craft cutter to get the job done.
Thank you, Expressions Vinyl for sponsoring this post!
Click on their button, over there, and check them out! —————->>>


ok. you are way more clever than me. So cute!