If you are looking for the Freschetta Pizza and Bamboo cutting board giveaway, scroll down, or click {HERE}
………………………………………………….
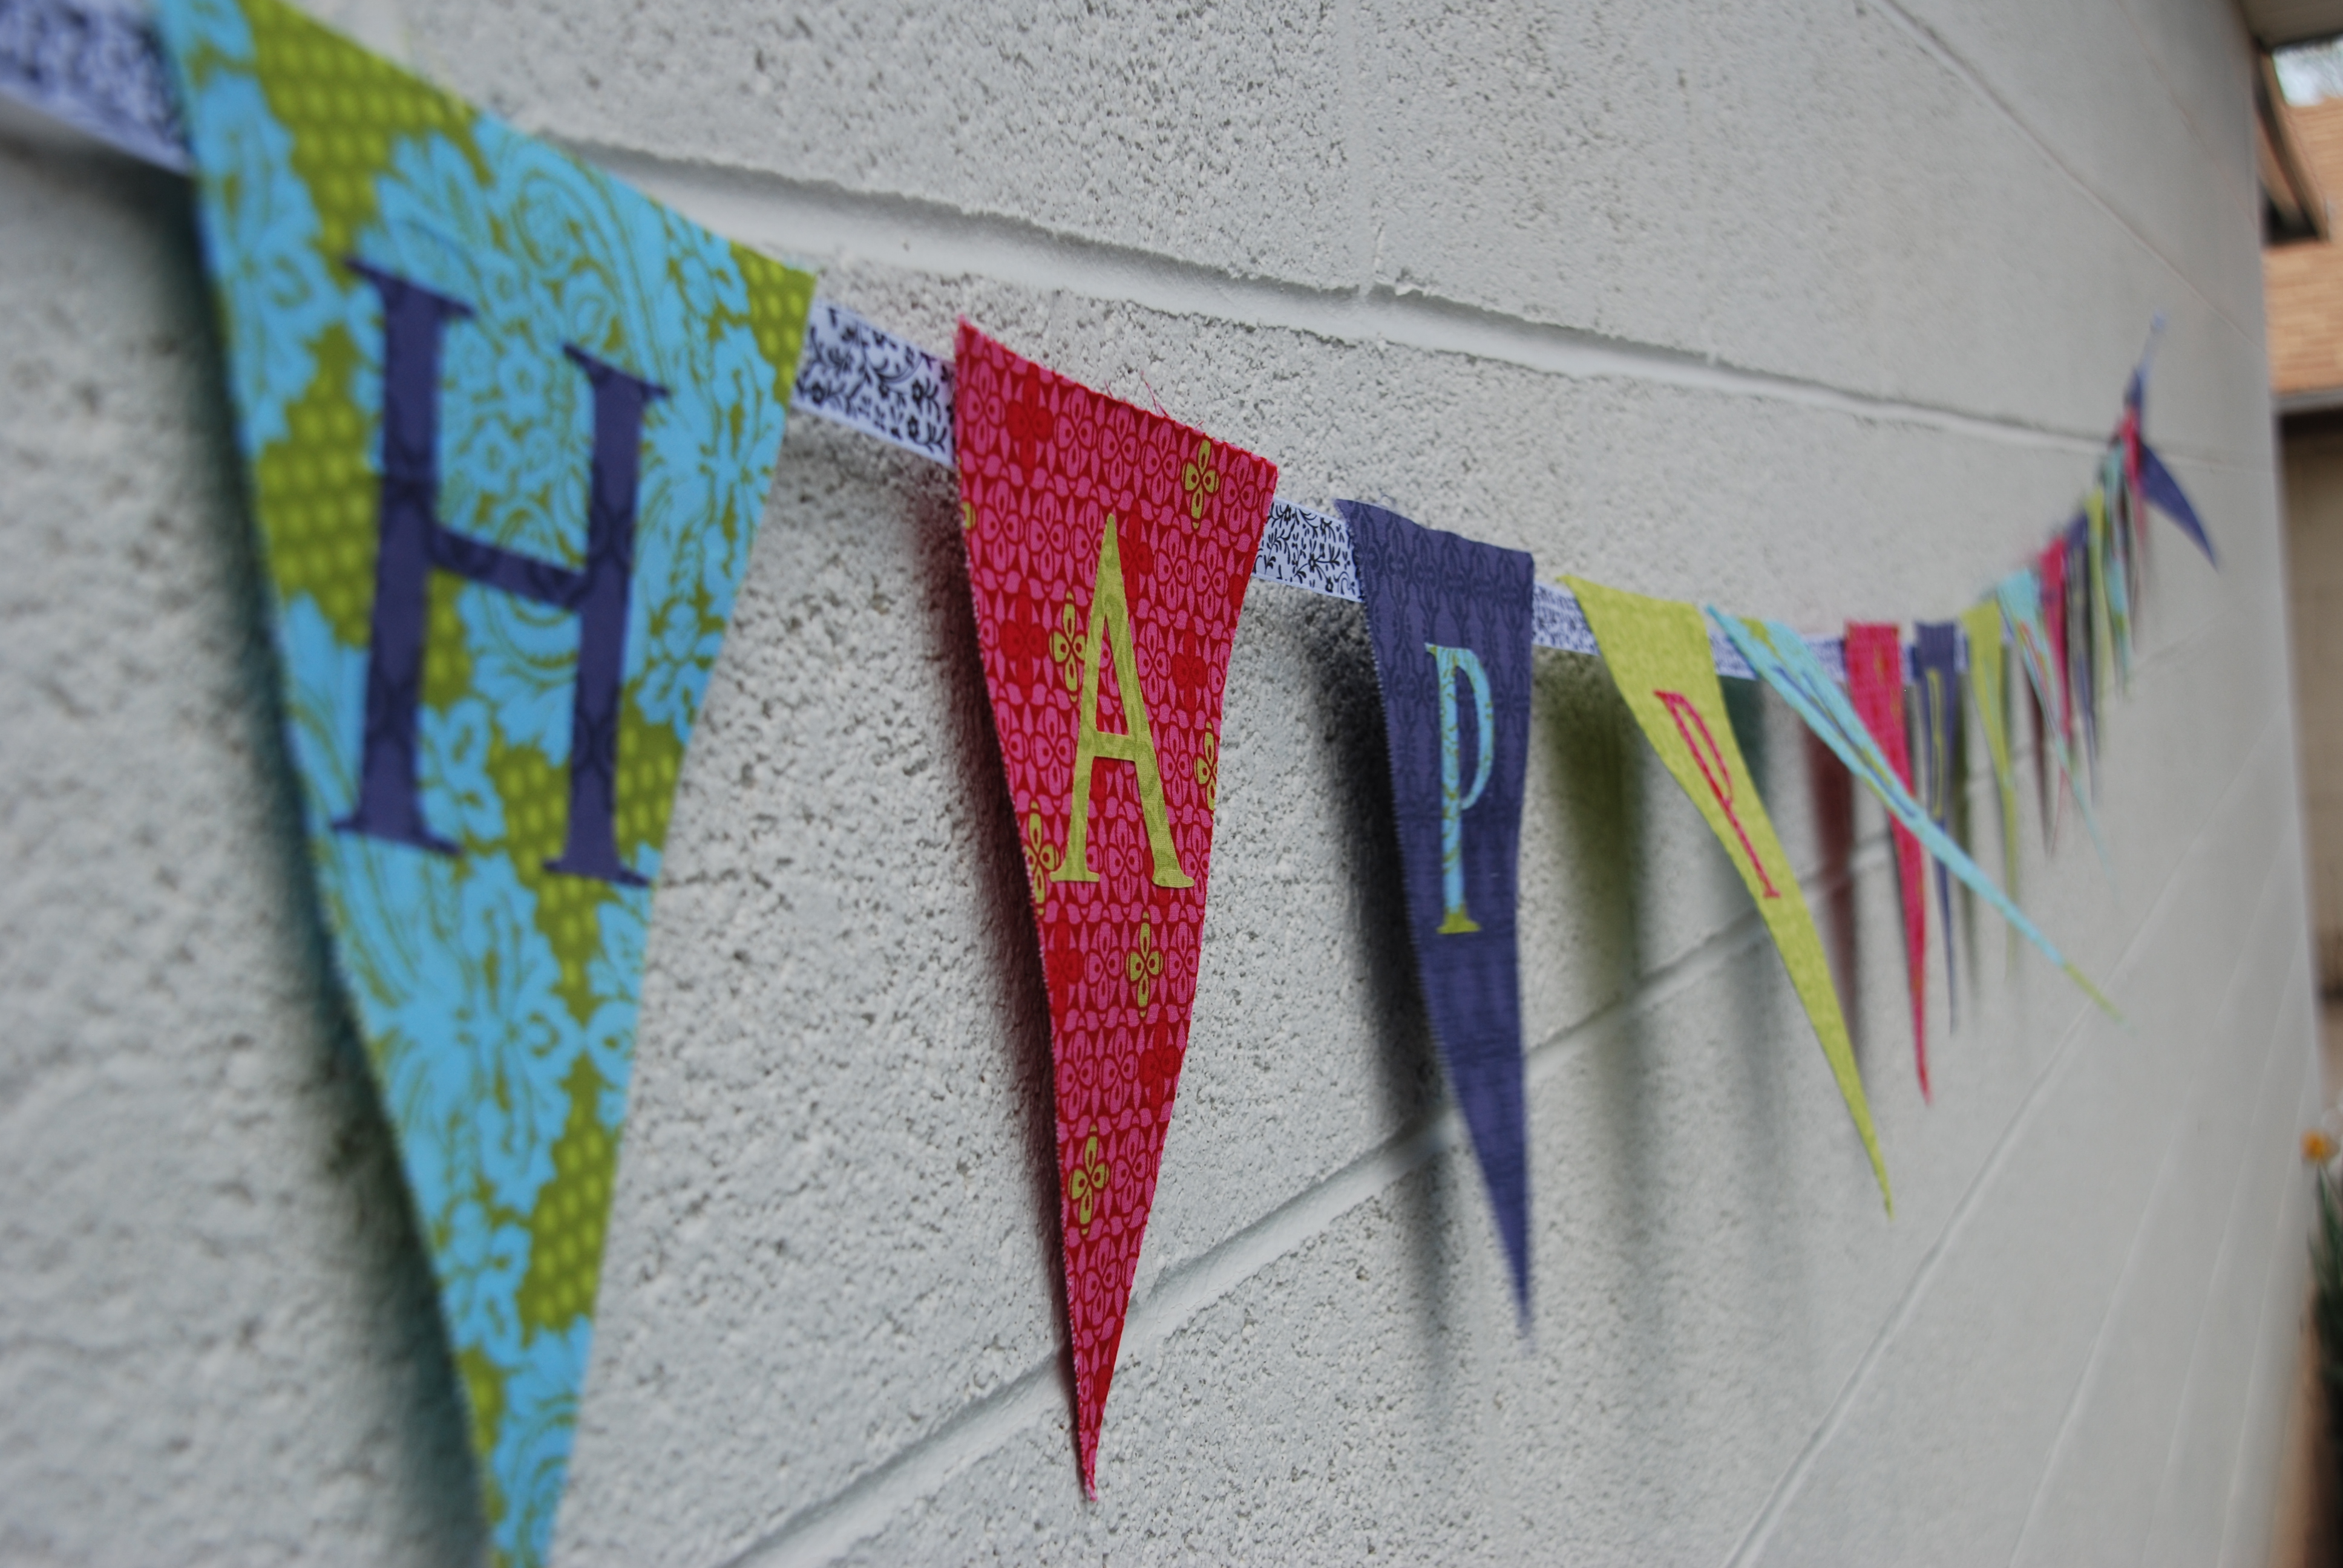
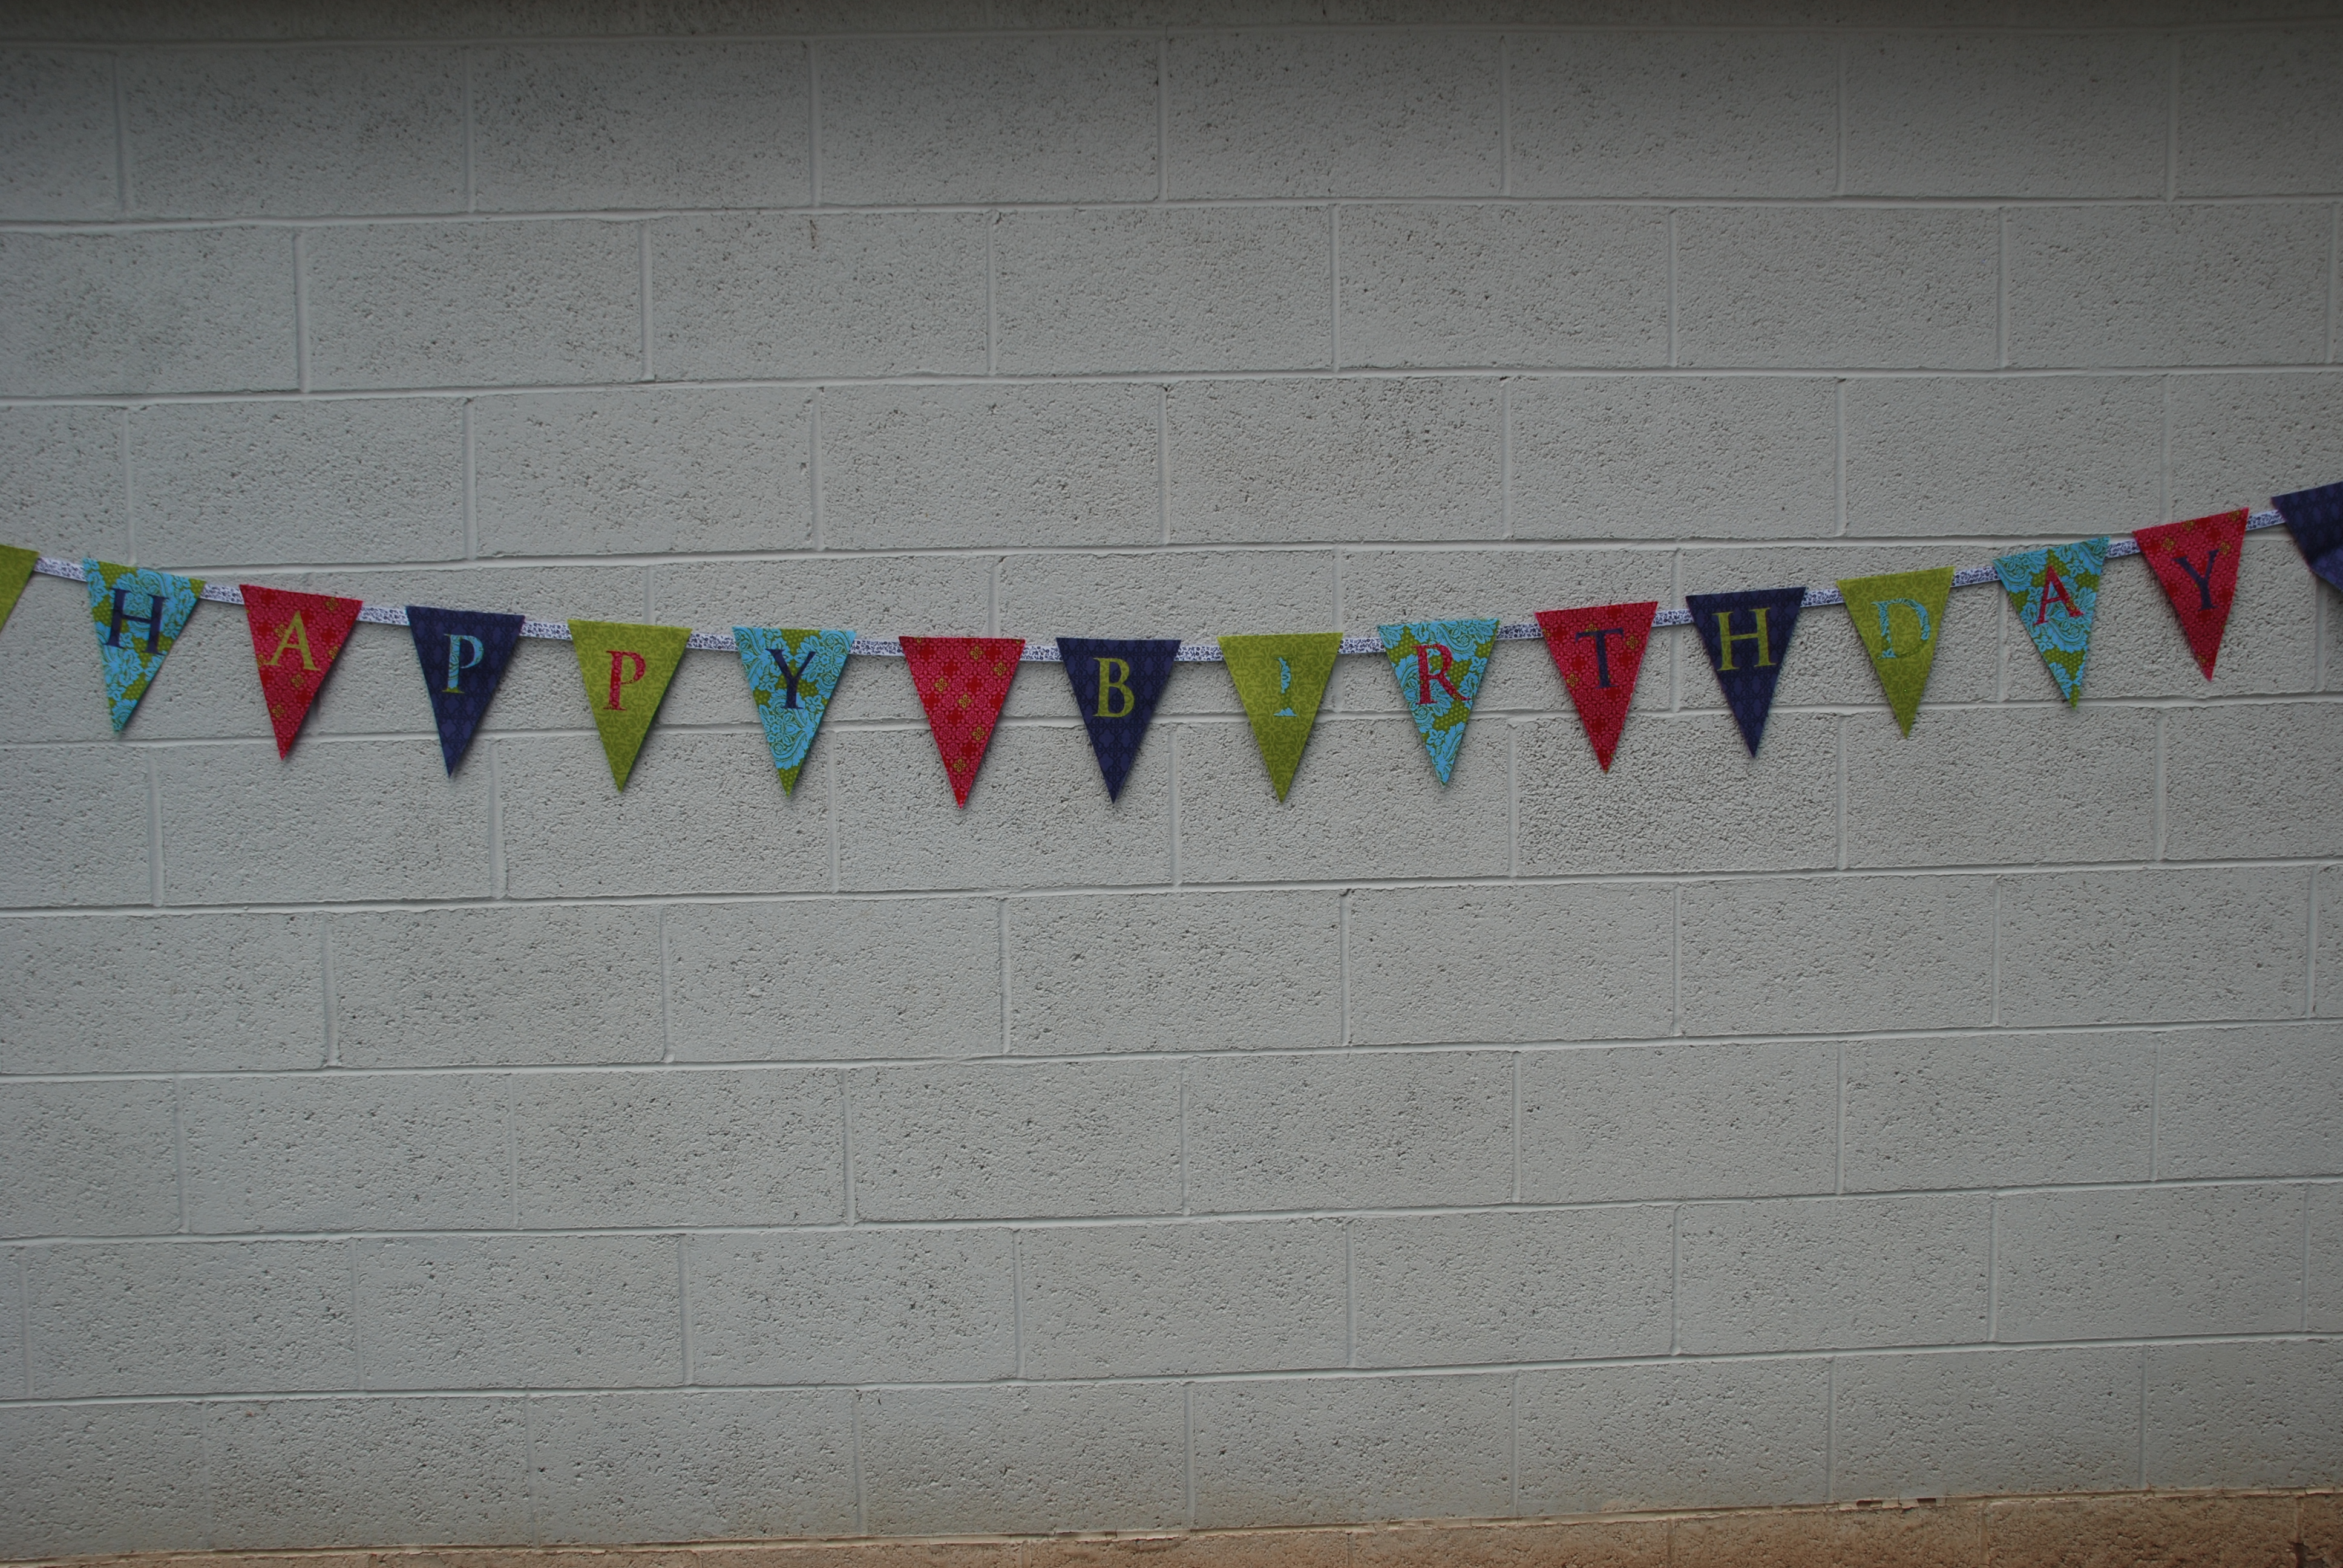
I love making birthdays a special event at our house, and one thing that really helps is having some decorations hung up to remind us that it’s someone’s special day!
So, I made this cute Birthday Banner for Molly’s first birthday, and since then, we’ve made sure to hang it up every time there’s a birthday.
I made it out of fabric instead of paper, so it’s super durable and will last us for years to come!
Wanna make your own? Here’s what you’ll need:
1/4 yard of 4 different fabrics, or fat quarters (I tried to get bright, fun, gender-neutral fabrics)- Or, use your scraps if you can!!!
Ribbon
Heat N Bond
Hot Glue
I used my Cricut, so I’m giving instructions based on that. You could probably do the same thing with a Silhouette, if you have one.
If you don’t have an electronic cutter, you could cut everything by hand.
The first thing you do is take your heat n bond (I used the red package), and iron it on the backs of your fabric.
(You could also probably use Wonder Under. The reason I used Heat-n-Bond is because if you’re cutting fabric with your Cricut, it cuts better with Heat-n-Bond because it is more plastic-y and less likely to shred and stick to your mat when cutting on your Cricut, like Wonder Under would.)

Once your fabric has been Heat-n-Bonded, cut it into triangles. I did this on my Cricut (Heat-n-Bond side stuck to the mat), make sure your blade is at a 5, your speed on the lowest, and your pressure to the max. Remember, you could also do this by hand.
I also cut out all of the “HAPPY BIRTHDAY” letters (backed with Heat-n-Bond). Same technique, on my Cricut.

Then, iron your letters onto your fabric.


Then, take some ribbon and hot-glue it to the corners of your triangles (on the back- I did my triangles double-sided). My ribbon strips were about 3 inches long.

Here’s a front view.

Once you have all of the pieces hooked together, you’ve got yourself a BANNER, folks!


Tip: If you want to do this double-sided, like I did, you’ll cut out 16 Heat-n-Bonded triangles, then iron them to the back of your remaining (non Heat-n-Bonded fabric), and trim around the edges. This is tricky if your using a Cricut, because in order to cut fabric on your Cricut, you really should have it Heat-n-Bonded, but you don’t want both of your pieces Heat-n-Bonded. Â So, basically, you’ll have to cut one set of triangles with your Cricut (Heat-n-Bonded), and one set by hand (non Heat-n-Bonded).

If you get stuck or confused, leave me a comment and I’ll try to answer it ASAP.
Have a good day, Ladies.
Kerri Hager says
Hi! So glad I found this! I do have some questions though, if you would be willing to answer them. I’ve never used heat n bond.
Did you heat n bond a large piece of fabric before you cut the letters out of it? Or did you cut the letters then do the Heat and bond on them? And then when you iron them to the triangles did that affect the Heat n bond backing on the triangles? Do I need to do another layer of heat and bond on the letters before I iron them to the triangles?
Thank you!
Rhona says
hi
if i want to make 1 big banner on a square piece of material can i use the same method.
Ashley says
Very cute! I just got my cricut and I’ve only started to play with it but I would love to make this for my brother’s party next week. Do you have to use a cartridge to cut the simple triangles or is there a setting? I have the Cricut Expression. Thanks for your tutorial and your comments.
CVwe Vivi Ka Bill says
Last year for Christmas my husband surprised me with the Provo Craft Cricut die cutting machine. I was surprised because I already own the Sizzix cutting tool …crafts
Suzanne says
This is adorable! Thanks for sharing.
Amy says
Love the fabrics you used. I really need to give cutting fabric with my cricut a try!
xoxo,
Amy
Stephanie Lynn says
Your banner is adorable – I love all the pretty colors! Thanks for sharing – Hope you had a wonderful weekend!
~Stephanie Lynn
http://www.bystephanielynn.com
EmRuss says
love it, Nat. I need to make one of those!