
Spring Kissing Balls
Remember when I made my Crepe Paper Rose Wreath for Valentine’s Day?
I loved it! I seriously contemplated leaving it hanging on my door all year because it was so cute! {I still might!}
So, I decided to make something very similar for Spring, but on a ball instead of a wreath.

And guess what? I love these too! And, yes, I might leave them sitting around all year long!

Wanna make your own? Here’s what you’ll need:
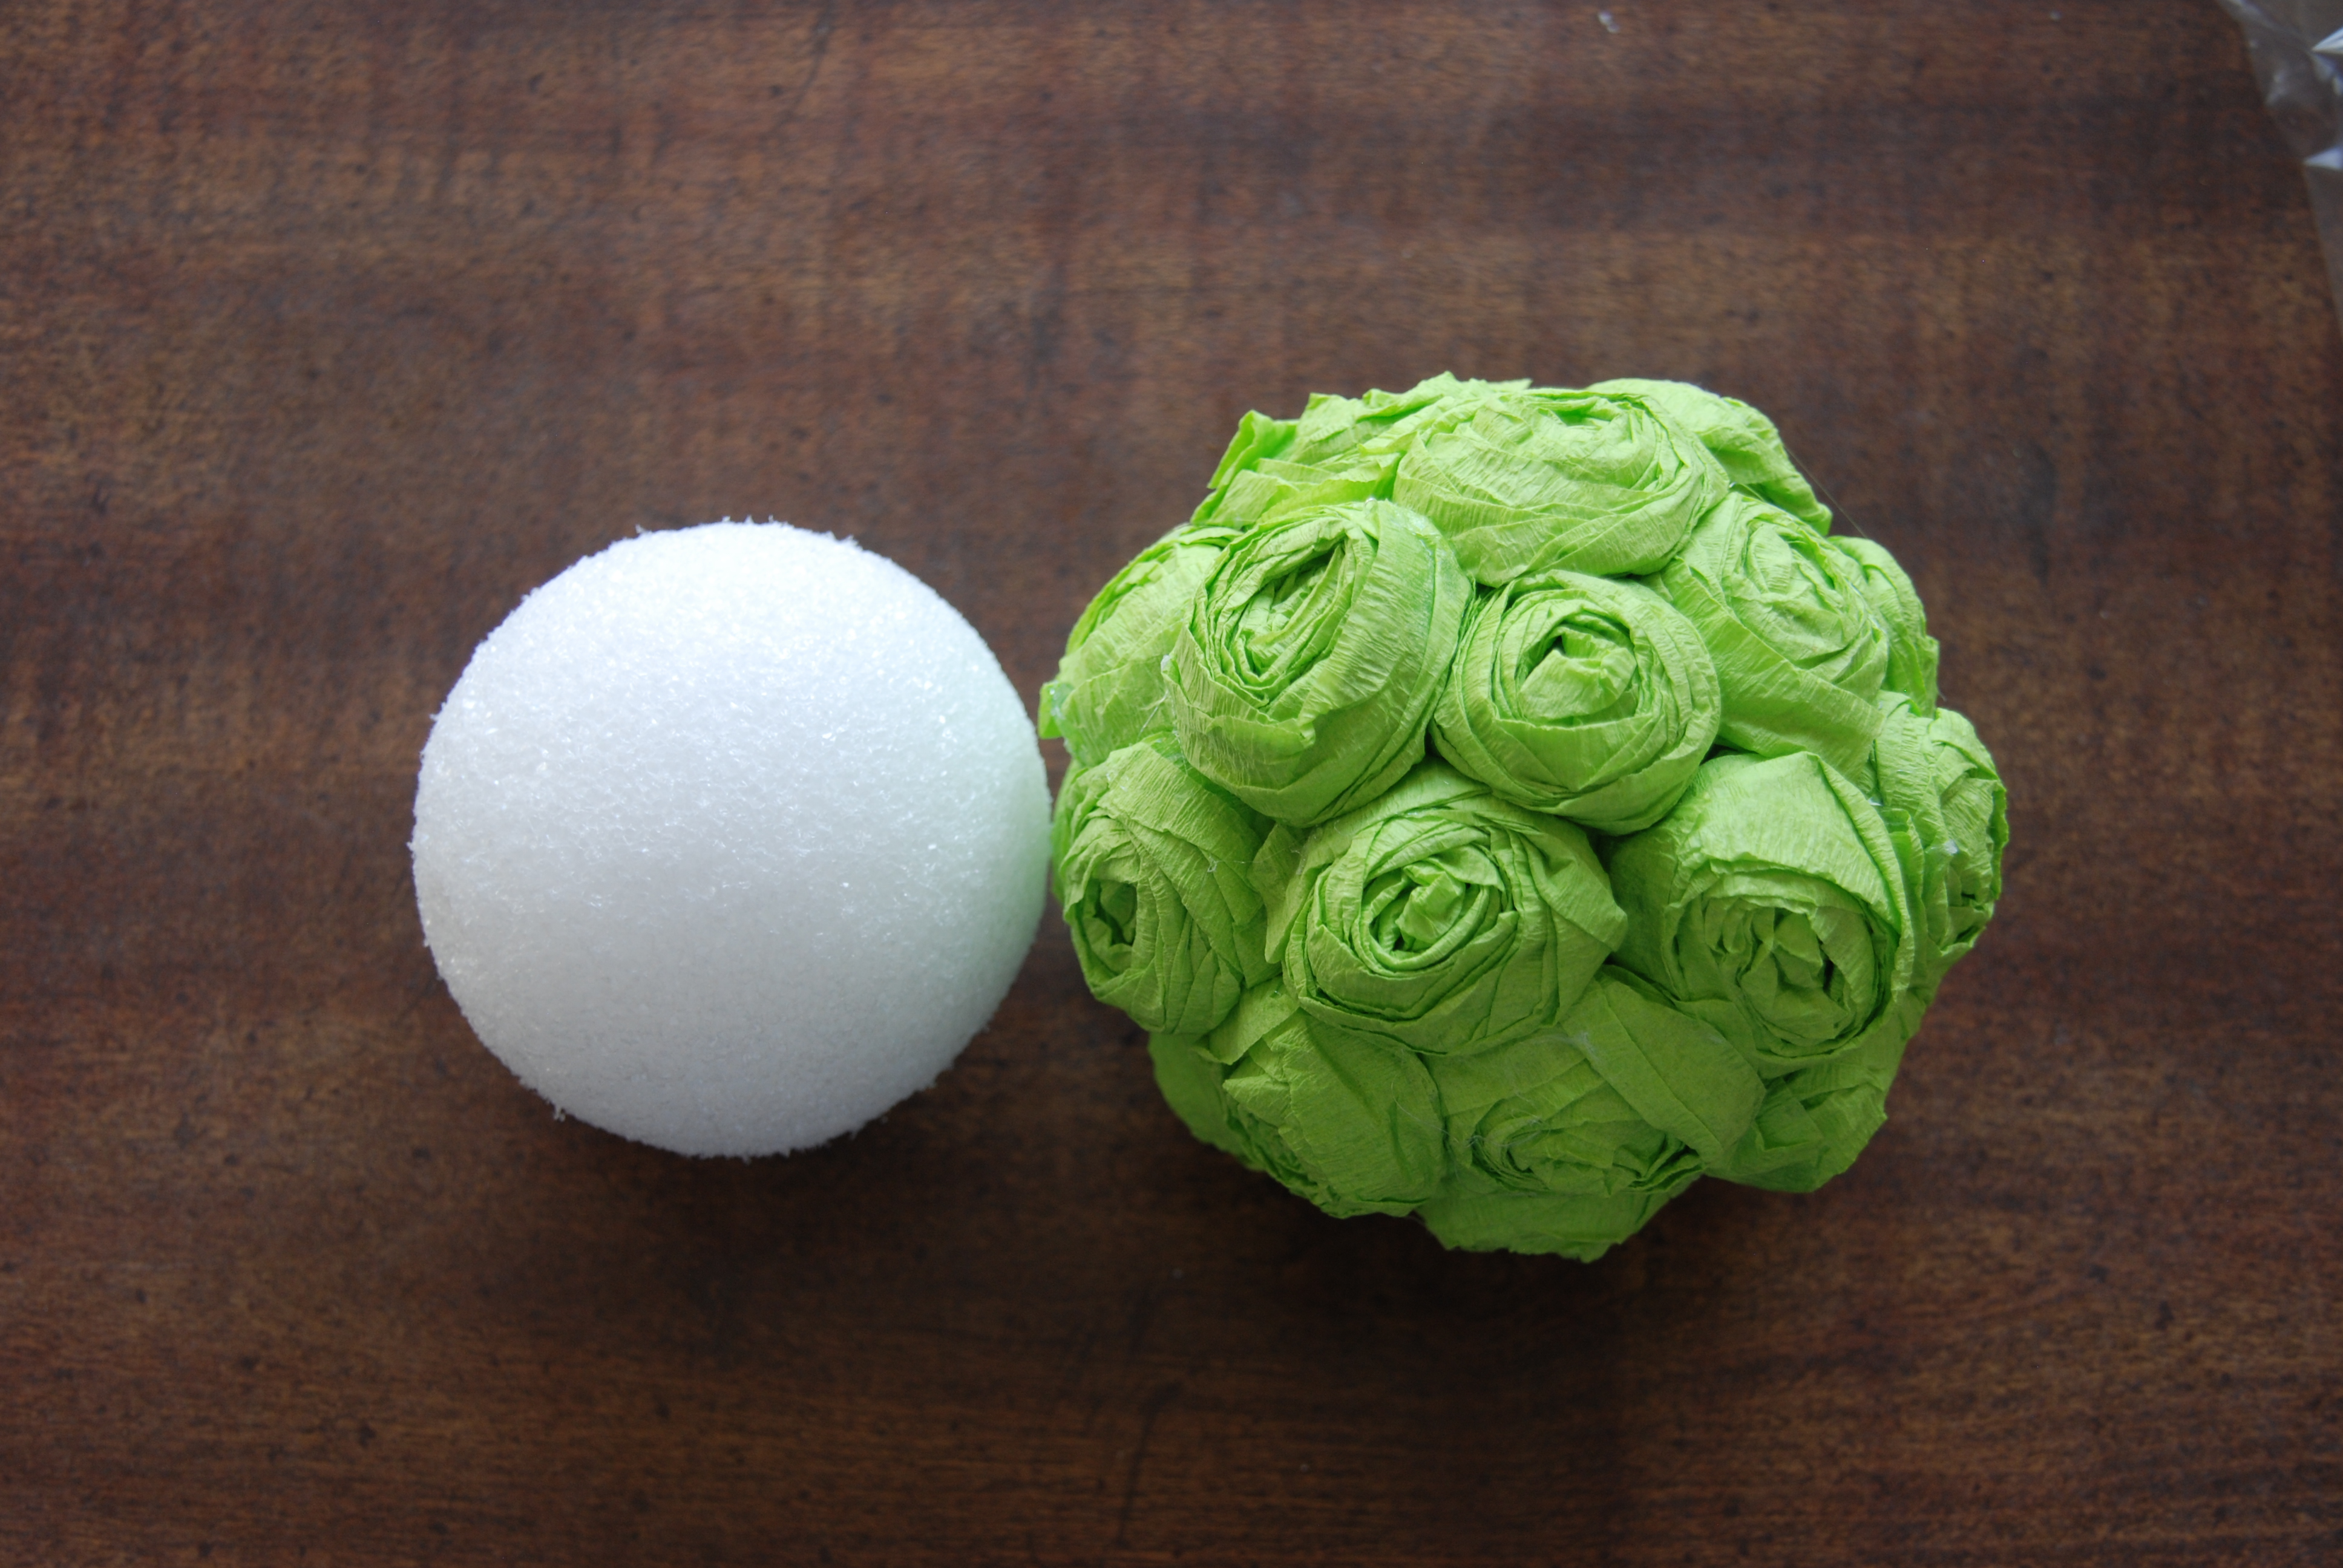
Styrofoam balls
Crepe Paper
Glue gun and LOTS of glue sticks

I got everything at Hobby Lobby.
My Styrofoam balls were 3 inches. I really wanted bigger ones, but I didn’t want to pay twice as much for them, so I got the smaller ones
I’m really glad I went with the smaller ones after all, because they almost doubled in size once the rosettes were on.

So here’s how to make the cute little things:
The first thing you do is make your rosettes.
I cut a whole bunch of crepe paper streamers in about 24 inch lengths.
Then all you do is wrap it around and around. I start it out wrapping around my thumb.

Start wrapping and twisting. Since the balls are pretty small, you want to wrap and twist pretty tight to get smaller rosettes.
It might take you a few tries to get the hang of it.

Once it’s all wrapped, Â just hot glue the tail down.
Keep going until you’ve got precisely a bajillion rosettes.

It’s always good to have a cute little red-headed helper.

Once you’ve got all of your flowers ready, spread a whole grundle of hot glue on the back.

And stick your rosettes to your Styrofoam ball.

Keep gluing them on until the whole thing is full.
I don’t like spaces between mine, so I squish them really tight together.

If your fingers look like this and are burned beyond feeling, then you’re doing it right!

Just keep gluing them on until your ball is all covered and you’re done!
It gets pretty tedious making all of the flowers, but I just did it while I watched the Biggest Loser, so it didn’t seem like that long.
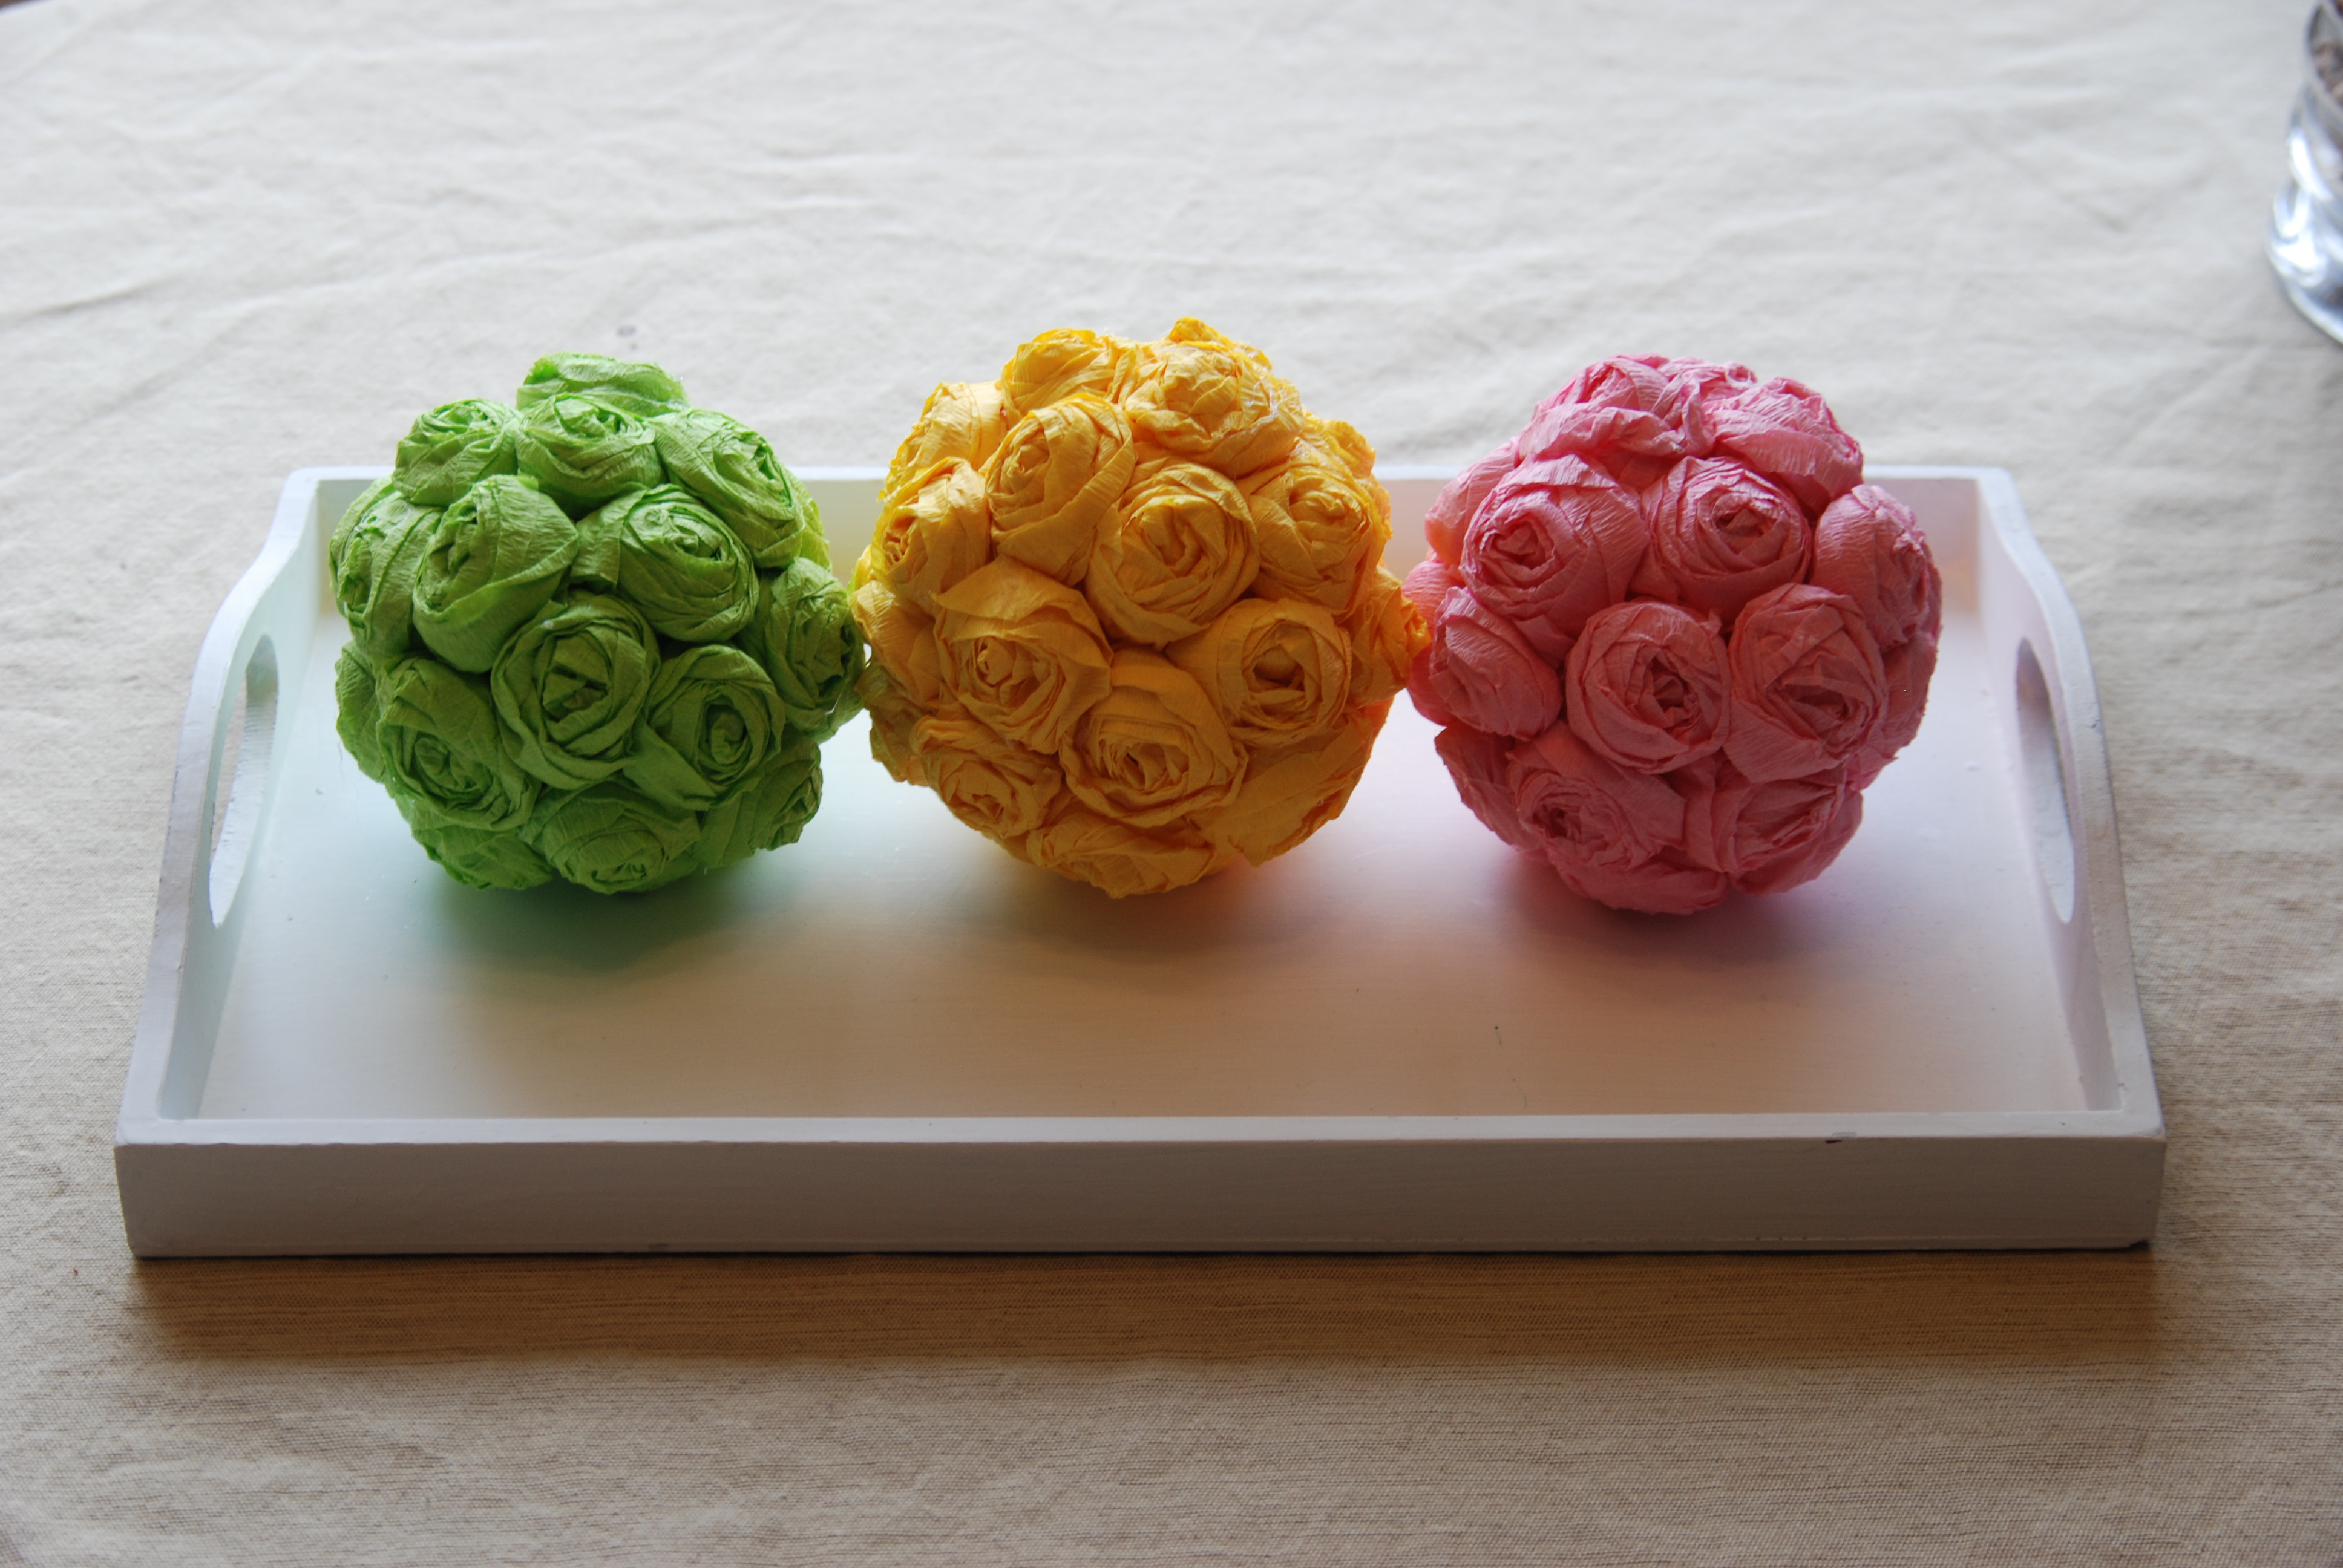
I made a few in different colors for Spring. And yes, I love them all.
I stuck them on a tray with some spring flowers, and it really brightens up my kitchen.

And yes, that is my thrift store tray. Hard to believe it used to have a picture of a snowman holding a flag, eh?

Come back on Thursday I’ll show you how I arranged those spring flowers.
Here’s the breakdown on how long this took and how much it cost:
Total time to make: About 1 1/2 hours.
Total cost: $5.39
Styrofoam balls: $4.77 (for 6. I only used 3, so $2.39 )
Crepe Paper: $3.00 for 3 rolls (I only used about 1/3 of each roll, but we’ll still count it.)
Hot glue: Already had it, but it uses A LOT!
If you really do make these kissing balls {or anything from my blog}, please send me a picture! I love to see all of the things you gals are working on!
mycorduroydreams{at}gmail.com
P.S. This is my entry into the DIY Project Party Contest.

Great Blog and Thanks for sharing! I’m going to feature you on my blog BlueLeafEvents.Blogspot.com today great ideas!
I am so totally making these and you did them in my colors as well!
Fabulous!!
These are so lovely! I’ll be sharing them in my Saturday Seven lineup tomorrow morning. 🙂
Love this! I am getting together with my sister-in-law this weekend to make some of these! 🙂 I posted this on my blog as a great spring idea.
http://www.thecraftproject9.blogspot.com
These areFANTASTIC! I love every inch of them. I think they would be darling to hang from a chandeliere for a birthday party too! I would be delighted to have you link this to my VIP party this weekend =) http://designergarden.blogspot.com/2011/04/vip-party-10.html
What a cute idea! Love it.
Super darling and clever! Love this idea!
Found you through the link-up. The picture just made me smile and I HAD to see these Spring Kissing Balls : )
So stinkin’ CUTE!
AOK*
These are really, really cute. I need to find a movie I want to watch and make these! Thank you.
Absolutely adorable! I love the colors you chose! I’m making these to use for aisle decorations for our wedding in June.
Really cute!
So cute and what a great way to use up the ends of the rolls of crepe paper! Your little helper is adorable too!
Oh how cute!!!
OMG
a. I just found you through the link up. and you are my hero.
b. I have some candle stands just neeeeeding these! I’m off to Hobby Lobby for supplies.
c. I’ve never made rosettes with crepe paper. brillian. again, you are my hero.
🙂
xoxoxo
Erin
love the colors! I did something similar
come visit
chickhardware.blogspot.com
You make it look so easy. They are beautiful!
These are adorable. I am stopping by from thirtyhandmadedays pity party! I would love to feature these on my blog. I am doing a Friday Finds.
http://www.warmfuzzypurpleandgold.blogspot.com
stop by if ya get a chance…your blog is one of my new stops lately 😉
These are so adorable! I am going to feature them on my blog tomorrow!
http://www.thegunnysack.com
Stopping over from Kojo Designs linky party.
I LOVE your blog!! You make me laugh out loud and have such practical ideas! Thanks for improving my vocabulary(‘grundle’) and giving instructions like we are hanging out around the table with you and your cute red-headed helper! I look forward to hot-gluing until my fingers are ‘burned beyond feeling’! Thank you for sharing!!
Oh my GOSH Natalie!!! I LOVE these! You are so adorable, and I am getting more and more envious everyday!